

How to Set Up a Hot Tub: From Delivery to First Soak

Setting up a hot tub is easiest when you treat it as a sequence: prepare the site, confirm permits and electrical work, plan delivery access, place the spa, fill it correctly, start circulation, balance the water, and only then use it.
The exact electrical and startup steps depend on your spa model, so keep the owner’s manual beside you during the process.
This guide focuses on a typical U.S. portable or hard-shell hot tub setup from delivery planning through the first soak. It does not replace the model-specific pre-delivery guide, local electrical code, permit requirements, or instructions from your dealer and electrician.
Download the Hot Tub Setup Checklist
Use the printable checklist to track site preparation, delivery, electrical work, filling, startup, and first-soak water checks without trying to remember every step.
Hot Tub Setup at a Glance
| Stage | Main task | Do not skip |
|---|---|---|
| 1. Planning | Choose location and check rules | Permits, setbacks, service access |
| 2. Base | Prepare a stable level foundation | Filled weight and drainage |
| 3. Electrical | Install the required supply | Model manual, GFCI, inspection |
| 4. Delivery | Move and position the spa | Gate width, turns, overhead clearance |
| 5. Fill | Fill according to the manual | Correct water level and leak check |
| 6. Startup | Start circulation and verify operation | Flow, pumps, filters, no error codes |
| 7. Water care | Balance and sanitize the water | Retest before the first soak |
Step 1: Choose the Location Before Delivery Day
The best hot tub location is not simply the prettiest corner of the patio. It needs a suitable foundation, safe electrical access, drainage, delivery access, privacy, and enough room to service the equipment later.
- Confirm the spa dimensions and orientation.
- Identify which side contains the main equipment access panel.
- Leave the service clearance required by the manufacturer.
- Make sure the cover can open without hitting a fence, wall, railing, or roof.
- Plan a stable walking route to the spa.
- Think about drainage after rain, splashing, and future water changes.
Jacuzzi’s current pre-installation guidance specifically tells owners to evaluate the foundation, delivery route, electrical requirements, gates, turns, overhead obstructions, and service access before delivery. Hot Spring likewise publishes model-year pre-delivery instructions covering site selection, delivery access, ground preparation, and electrical requirements.
If you need the broader installation planning view, see our hot tub installation guide.
Step 2: Check Permits, Setbacks, and HOA Rules
Do this before building the base or scheduling electrical work. Permit requirements vary by city and county. A portable spa may be exempt from a building permit in one jurisdiction while the electrical work, deck, zoning, or barrier requirements still need review.
Ask your local building or permitting office about electrical permits, building permits, setbacks, barriers, plumbing or mechanical permits if applicable, and deck structural review. Check HOA rules separately because private community approval is not the same as a government permit.
Our hot tub permit guide explains the questions to ask before installation.
Step 3: Prepare the Hot Tub Base
A filled hot tub is extremely heavy, so the foundation must support the tub, water, equipment, and people without settling or twisting the spa shell.
Common bases include a properly built concrete slab, manufacturer-approved spa pad, engineered deck, or another foundation specifically allowed for your model. The surface must meet the hot tub manufacturer’s requirements for levelness and support.
Do not use random shims to level the cabinet unless the manufacturer specifically allows that method. Supporting only part of the spa base can create stress the shell or frame was not designed to carry.
For the pros and cons of common foundation options, use our best hot tub base guide.
Step 4: Complete the Electrical Work
Electrical requirements vary widely between hot tubs. Some portable spas use a manufacturer-approved 120V cord-and-plug connection. Many full-size spas require a dedicated 240V circuit, GFCI protection, disconnecting means, and model-specific wiring.
Do not choose breaker size, wire size, disconnect location, or bonding details from a generic online diagram. The electrician should use the electrical label and installation manual for your exact model and follow the code edition adopted locally.
The U.S. Consumer Product Safety Commission recommends having a qualified electrician inspect and install hot tub electrical equipment according to applicable local codes and the National Electrical Code. CPSC also emphasizes GFCI protection around pools, hot tubs, and spas.
- Complete required electrical permits before the installation reaches the inspection stage.
- Keep electrical connections and equipment dry.
- Test GFCI protection as directed by the manufacturer and electrician.
- Do not use an extension cord unless the spa manufacturer specifically permits the exact setup.
Step 5: Prepare the Delivery Route
Measure the route, not just the final location. A spa that fits the patio can still get stuck at a narrow gate or sharp turn.
- Measure gates, doors, sidewalks, and side-yard width.
- Check every 90-degree turn.
- Move furniture, planters, grills, and loose obstacles.
- Check low branches, roof overhangs, gutters, meters, and overhead wires.
- Confirm whether stairs, retaining walls, or tight access require special equipment.
- Arrange crane delivery in advance if the dealer says it is necessary.
Jacuzzi specifically recommends checking gate widths, walkways, turns, and overhead obstacles before the installation crew arrives.
Step 6: Position and Inspect the Hot Tub
Once the spa reaches the prepared base, orient it so the controls, drain, equipment panel, cover, and future service path all make sense.
- Inspect the cabinet and shell for delivery damage before filling.
- Confirm the equipment panel is accessible.
- Check that the drain can be reached later.
- Confirm cover-lifter clearance if one will be installed.
- Verify the spa sits on the prepared base as the manufacturer requires.
If the spa does not sit correctly on the base, fix the foundation problem before filling rather than trying to force the cabinet level after thousands of pounds of water are added.
Step 7: Fill the Hot Tub Correctly
Read the model’s filling instructions before turning on the hose. Some manufacturers specify a particular fill point, such as the filter compartment, to reduce the chance of trapped air in the plumbing.
- Make sure the drain is closed.
- Install filters and components required before filling.
- Place the hose where the manufacturer instructs.
- Fill to the specified water level.
- Check the cabinet and ground for leaks while filling.
- Do not energize pumps or the heater while the spa is empty unless your manufacturer specifically instructs otherwise.
If you need more help with the water-fill process or air-lock problems, see our hot tub refill guide.
Step 8: Start the Spa and Check Circulation
Once the spa is filled to the required level and the electrical work is ready, start it according to the owner’s manual.
- Confirm the control panel starts normally.
- Verify water is moving through the circulation system.
- Run pumps and jets as directed during initial startup.
- Look for leaks around unions, pumps, and visible fittings.
- Confirm filters are installed correctly.
- Watch for flow, air-lock, heater, or electrical error messages.
A pump that runs dry, repeated GFCI trip, burning smell, visible electrical problem, or significant leak is not a “keep trying” situation. Shut the system down safely and contact the dealer, manufacturer, electrician, or service technician as appropriate.
Step 9: Balance the Water Before the First Soak
Fresh water is not automatically ready for soaking. Test the water and follow the startup sequence for your sanitizer system and hot tub manufacturer.
CDC recommends hot tub water at pH 7.0 to 7.8, free chlorine of at least 3 ppm, or bromine of 4 to 8 ppm. Your spa or sanitizer system may specify a narrower operating range, so follow those instructions as well.
Do not guess chemical doses. Tub volume, source water, product strength, and current test results all affect how much chemical is needed.
For the chemistry sequence and troubleshooting, use our hot tub water chemistry guide.
Step 10: Heat the Water and Prepare for the First Soak
Set the temperature after circulation is working and the water-care startup is underway. Heating time depends on the spa, starting water temperature, outdoor temperature, voltage, cover, and insulation.
Keep the cover closed while heating unless the manufacturer or chemical instructions tell you to leave it open temporarily after adding a product.
Before anyone enters:
- Retest sanitizer and pH.
- Confirm water temperature is no higher than 104°F.
- Make sure steps and walking surfaces are stable.
- Remove the cover completely.
- Keep household electrical products and cords away from the water.
First-Soak Safety Basics
CDC advises keeping hot tub water at or below 104°F, not allowing children under 5 to use hot tubs, avoiding alcohol before or during use, showering before entering, and having pregnant people speak with a healthcare provider before using a hot tub.
That is more useful than a blanket rule that everyone must soak for exactly 15 minutes or that everyone with a medical condition is automatically prohibited. Personal health circumstances vary, and the spa owner’s manual may include additional warnings.

Common Setup Problems
| Problem | First check | When to stop |
|---|---|---|
| Pump runs but little or no water moves | Water level, filter placement, startup instructions, possible trapped air | If the pump is running dry or repeatedly faults |
| GFCI trips | Follow the spa manual and electrician’s troubleshooting process | Repeated trip, wet electrical equipment, damaged cord, burning smell |
| Leak appears after filling | Drain, unions, visible fittings, delivery damage | Fast leak, equipment-bay leak, electrical components getting wet |
| Water will not heat | Set temperature, circulation, filters, error messages | Electrical fault or repeated heater error |
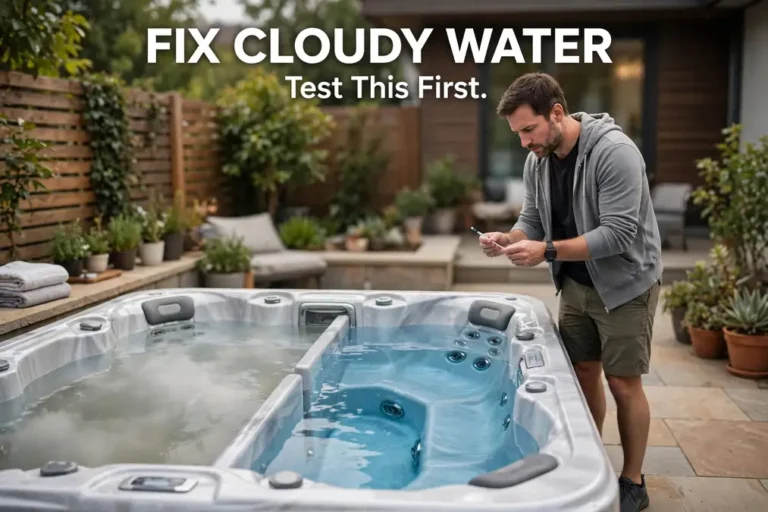
| Water turns cloudy during startup | Sanitizer, pH, filtration, source water | Do not soak until the cause is corrected and water retested |
What You Do Not Need to Finish on Setup Day
Do not overload delivery day with landscaping, entertainment systems, permanent privacy structures, or decorative accessories. Get the hot tub supported, powered, filled, circulating, balanced, and safe first.
Once the spa has operated normally for a few days, add steps, handrails, storage, privacy, lighting, and other backyard features without blocking the equipment panel, drain, cover path, or electrical access.
Frequently Asked Questions
Can I set up a hot tub myself?
You can handle planning, base preparation, filling, and water-care tasks if they are within your skills and the manufacturer allows it. Hardwired electrical work, structural deck changes, and other code-regulated work should be handled by qualified professionals as required locally.
Should the hot tub be filled before turning on the power?
For normal spa operation, the tub needs to be filled to the manufacturer’s required level before pumps and the heater are run. Follow the exact startup sequence in your manual because electricians may perform specific electrical tests before the spa is filled.
How level does a hot tub base need to be?
The foundation should meet the level and support tolerances specified by the hot tub manufacturer. Do not assume you can correct a poor base with random shims after delivery.
What chemicals do I need when setting up a new hot tub?
The exact startup products depend on whether you use chlorine, bromine, salt, mineral, or another approved system. At minimum, you need a reliable way to test sanitizer and pH and the products specified by your spa and sanitizer instructions.
How soon can I use a new hot tub after filling it?
Use it after the spa is operating normally, the water has reached a comfortable temperature, and sanitizer and pH have been tested and are within the appropriate ranges. Do not use a fixed number of hours as a substitute for testing.
The Setup Sequence That Prevents Most Problems
The safest order is simple: confirm the location and rules, prepare the foundation, complete the electrical work, clear the delivery path, position the spa, fill according to the manual, start circulation, test the system, balance the water, and retest before soaking.
Use the downloadable checklist at the top of this page beside your owner’s manual on delivery day. The manual supplies the model-specific numbers, while the checklist helps make sure no major setup stage gets skipped.
For manufacturer planning examples, see the Hot Spring pre-delivery instructions and Jacuzzi pre-installation checklist. For electrical safety, see the U.S. Consumer Product Safety Commission guidance. For first-soak water and temperature guidance, see the CDC hot tub safety guidance.







3 Comments
Comments are closed.