
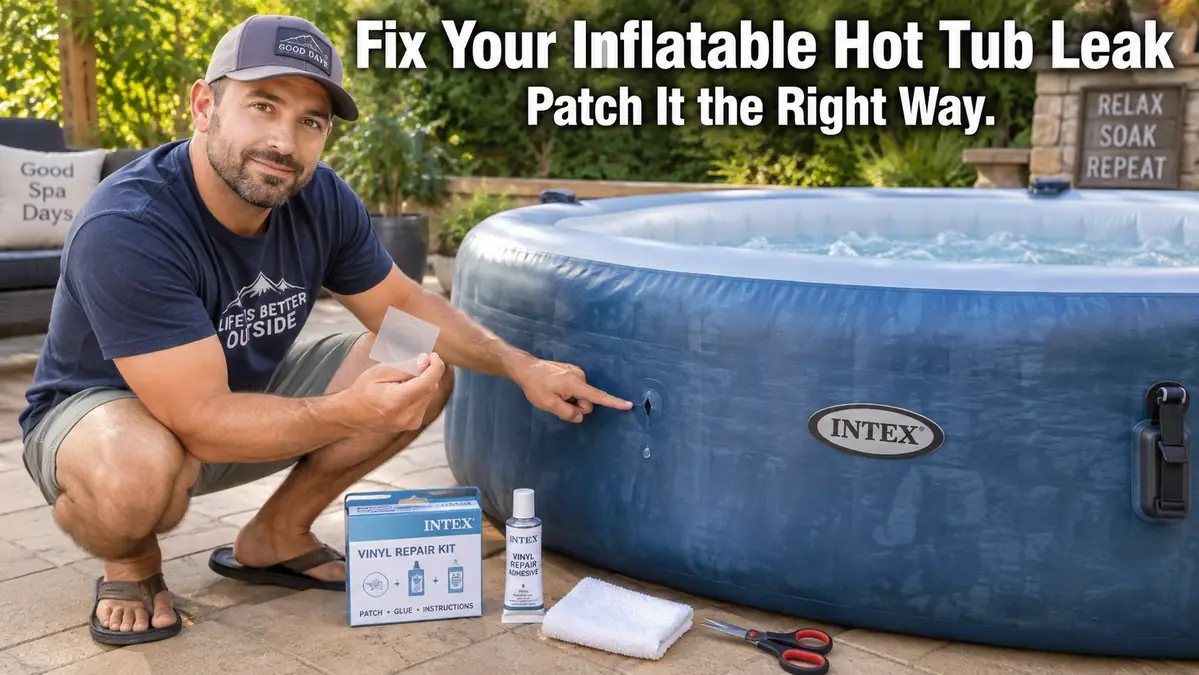
Inflatable Hot Tub Patch Kit: How to Repair a Leak That Holds

A small puncture in an inflatable hot tub can often be repaired with the correct PVC or vinyl patch kit. The harder part is figuring out what is actually leaking and whether a patch is the right repair.
A pinhole in a flat sidewall is very different from a separating seam, damaged valve, or leak around a fitting. Trying to patch the wrong type of damage is one of the main reasons owners end up repeating the repair several times.
Before buying another repair kit, identify the leak location, check what your spa manufacturer recommends for that part of the liner, and make sure the patch material and adhesive are compatible with your tub.
If you still cannot locate the leak, start with our guide to finding a water or air leak in an inflatable hot tub before patching anything.
Can You Patch an Inflatable Hot Tub?
Small punctures and minor tears on suitable sections of an inflatable hot tub can often be patched. Seam failures, damaged valves, large tears, and deteriorated liner material may require a different repair or replacement.
The leak location should determine your next step.
| Damage | Is a Patch Kit Usually Appropriate? | Best Next Step |
|---|---|---|
| Tiny puncture on flat sidewall | Usually | Compatible PVC or vinyl patch |
| Small exterior-floor puncture | Often | Follow manufacturer repair instructions |
| Small interior-floor puncture | Sometimes | Use the approved repair method for that area |
| Inflatable cover puncture | Often | Compatible cover patch |
| Seam separation | Often difficult or not repairable | Check manufacturer and warranty |
| Damaged air valve | Usually not a normal patch repair | Inspect valve or replacement part |
| Large or spreading tear | Usually not | Evaluate liner replacement |
| Multiple recurring leaks | Depends | Check liner condition before repairing again |
Bestway’s current SaluSpa guidance separates repairs by location. Its instructions use one method for covers and interior floors and another for walls and exterior floors. Intex similarly distinguishes ordinary punctures from seam failures.
That is why one generic patching process should not be used for every inflatable spa leak.
First, Make Sure You Found the Actual Leak
A patch cannot help if you are repairing the wrong spot.
For an air leak, diluted dish soap and water is one of the simplest detection methods. Inflate the tub according to its normal instructions, apply the mixture to suspected areas, and look for bubbles that continue growing.
Bestway and Intex both recommend a soapy-water bubble test for locating small air leaks.
Check these areas carefully:
- inflation valve
- flat sidewalls
- seams
- exterior floor
- inflatable cover
- fittings and connections
A spa becoming slightly softer during cold weather does not automatically prove that it has a puncture. Bestway notes that temperature changes and normal use can cause changes in air pressure, so look for an actual leak before cutting or gluing anything.
Mark the Hole Before Deflating
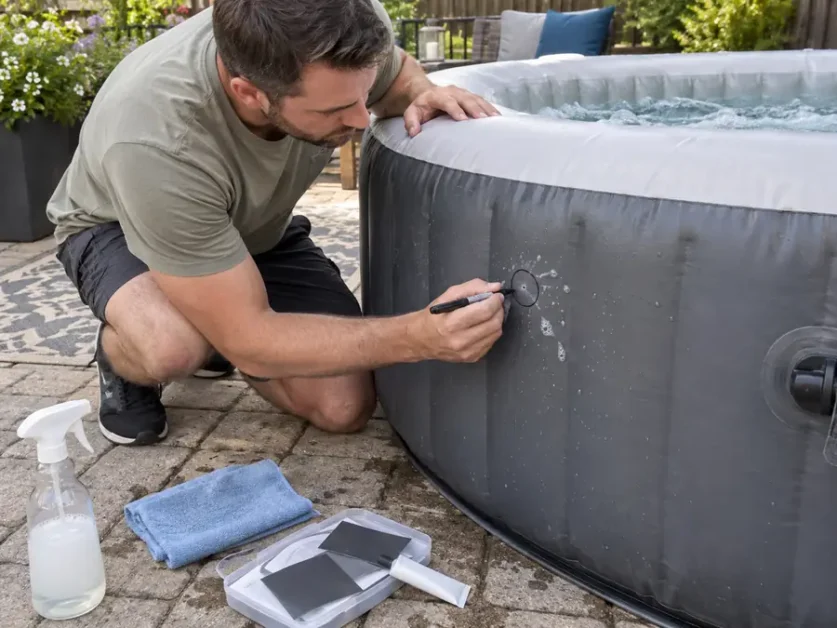
Once bubbles identify a small puncture, circle it lightly with a marker that will not damage the liner.
Tiny holes can become difficult to find again once the spa is deflated and the material changes shape.
What Should an Inflatable Hot Tub Patch Kit Include?
The best repair kit is the one that matches your liner material and the repair instructions for your spa.
A useful kit may include:
- compatible PVC or vinyl patch material
- flexible PVC or vinyl adhesive when required
- self-adhesive patches when approved for that repair
- cleaning cloth
- scissors
- marker
- roller or smooth rounded tool for pressing the patch
- instructions showing preparation and cure time
Some inflatable spas already include repair patches in the original box. Check your storage bag, manual, and spare-parts package before buying another kit.
Compatibility Matters More Than Kit Size
A kit containing 30 patches is not automatically better than the small patch supplied by your spa manufacturer.
Focus on:
- liner material
- damaged location
- patch material
- adhesive compatibility
- required curing process
A patch designed for a swimming pool, air mattress, or inflatable toy should not automatically be assumed suitable for your hot tub.
Self-Adhesive Patch vs PVC Patch and Adhesive
Both types can work, but they are not interchangeable in every repair.
Self-Adhesive Repair Patch
Self-adhesive patches are convenient because the adhesive is already applied.
They may work well for manufacturer-approved repairs such as certain small punctures in covers or interior surfaces.
Bestway, for example, instructs owners of some SaluSpa models to use the supplied adhesive repair patch on the cover or interior floor after cleaning the area.
Advantages include:
- quick application
- no separate glue
- less mess
- useful for small approved repairs
The surface still needs proper preparation. Dirt, water, body oils, or old adhesive can prevent the patch from bonding correctly.
PVC Patch With Flexible Adhesive
Some sidewall and exterior-floor repairs use a separate patch plus PVC-compatible glue.
Bestway’s current repair instructions for some Tritech walls and exterior floors call for a clean, dry surface, a cut PVC patch, evenly applied glue, firm pressure, and a set period before reinflation.
Do not substitute rigid household adhesive simply because it bonds plastic. Inflatable spa walls flex as the liner is inflated, heated, loaded with water, and used.
Follow the patch manufacturer’s and spa manufacturer’s instructions for the exact materials you have.
How to Patch a Small Inflatable Hot Tub Puncture
Use this process as a planning workflow. Your spa manual and repair-kit instructions take priority if they specify different preparation, adhesive, or curing steps.
1. Confirm the Damage Is Patchable
Look closely at the area before preparing the repair.
A clean pinhole on a flat liner surface is a much better patch candidate than a long seam separation.
If the liner is still under warranty, check the warranty requirements before modifying it.
2. Turn Off the Spa
Shut the spa down according to the manufacturer’s instructions before working around the liner, water, or equipment.
Do not perform a liner repair while electrical equipment is being serviced or opened.
3. Lower the Water or Deflate When Required
The correct preparation depends on the location and repair system.
Some approved patches can be used on certain interior surfaces. Other repairs require the area to be completely exposed, dry, and deflated.
Do not assume “underwater repair” means every patch can be applied to a full spa.
4. Clean the Area
Remove dirt, oils, chemical residue, and loose material around the puncture.
Avoid aggressive solvents unless the repair product or spa manufacturer specifically recommends them.
A contaminated surface is one of the easiest ways to get a patch that looks secure today and lifts tomorrow.
5. Dry the Surface When Required
For adhesive repairs that require a dry surface, let the area dry fully.
Pay attention to folds and textured sections where water can remain trapped.
6. Cut the Patch
Cut enough patch material to extend beyond the damaged area onto undamaged liner.
Rounded corners are preferable to sharp square corners because there is less exposed corner material to catch and peel.
7. Apply the Correct Adhesive
Skip this step if you are using an approved self-adhesive patch.
For patch-and-glue systems, apply the adhesive exactly as the instructions specify. More glue does not automatically create a stronger repair.
8. Press the Patch Firmly
Place the patch accurately the first time.
Work from the center toward the edges to push out trapped air and help the patch make full contact with the liner.
Bestway specifically instructs users to smooth out trapped air bubbles and press firmly during applicable sidewall and exterior-floor repairs.
9. Allow the Full Cure or Set Time
This is one area where universal advice causes problems.
Bestway documentation varies by model and repair location, with some instructions calling for short set periods and other current FAQ guidance recommending longer waiting before filling. Intex guidance for certain PureSpa repairs can require the tub to remain uninflated much longer.
Use the cure time for your exact spa, patch, adhesive, and repair location.
Do not reinflate simply because the surface feels dry.
10. Reinflate Gradually and Retest
Once the required cure time has passed, reinflate according to the manufacturer’s instructions.
Repeat the soapy-water test around:
- center of patch
- patch edges
- nearby seam
- valve
If bubbles still appear, stop before refilling the spa.
Image suggestion:
Close-up four-step visual showing an inflatable hot tub puncture being cleaned, covered with a rounded PVC patch, pressed from the center outward, and bubble-tested after curing.
Why Your Inflatable Hot Tub Patch Keeps Leaking
A failed patch does not always mean the repair kit was bad.
Several common problems can cause the leak to return.
The Surface Was Not Clean Enough
Body oils, residue from spa products, dirt, and old adhesive can prevent proper bonding.
Remove contamination before applying another patch.
The Area Was Still Wet
Water under an adhesive that requires a dry surface can weaken the repair.
Let the area dry for the time specified by the product instructions.
You Used the Wrong Repair Material
Inflatable hot tub liners need flexible repair materials that remain bonded as the spa expands and contracts.
A random household tape or hard-setting glue may not behave like a compatible PVC repair system.
You Reinflated Too Soon
Cure time matters.
Do not assume every PVC adhesive is ready after the same number of minutes or hours. Bestway and Intex instructions themselves demonstrate that repair procedures and waiting periods can differ.
The Patch Is Too Small
The adhesive needs intact liner around the damage.
If the patch barely covers the hole, normal wall movement can put stress directly on the damaged area and patch edge.
Air Is Trapped Under the Patch
Air pockets reduce contact between the patch and liner.
Press from the center outward during installation when the repair instructions call for it.
You Patched a Seam Failure Like a Pinhole
This is a major warning sign.
A seam is a structural connection between pieces of liner. A small patch placed over a separating seam is being asked to hold forces very different from those around a simple puncture.
Can You Patch an Inflatable Hot Tub Seam?
A seam failure should not automatically be treated like an ordinary puncture. Check the spa manufacturer’s instructions before attempting a repair.
Intex explicitly states that seam cracks on its PureSpa tubs cannot be repaired using its normal patching process. If the tub is under warranty, Intex directs owners toward a warranty claim.
For another brand, check that manufacturer’s instructions rather than applying Intex’s rule universally.
Signs that the problem may involve a seam include:
- bubbles forming directly along a welded joint
- the seam visibly separating
- a long leak instead of a pinhole
- the wall bulging around the damaged area
- repeated patch failure in the same joint
Before buying more glue, compare the cost and reliability of another repair attempt with a replacement liner.
Can You Patch an Inflatable Hot Tub Underwater?
Sometimes, but only when the spa manufacturer and repair product allow that type of application.
Bestway uses an adhesive patch for certain cover and interior-floor repairs on some SaluSpa models, while its wall and exterior-floor procedures use a different repair process.
Intex also provides specific instructions for certain punctures in sections of PureSpa tubs that are under water.
The key point is not that “underwater patches work.” It is that the repair method depends on the location, liner, and manufacturer.
A dry repair is usually easier to clean, position, press, and inspect when the manufacturer calls for one.
Best Repair Method by Leak Location
| Leak Location | Check First | Typical Direction |
|---|---|---|
| Flat sidewall | Pinpoint puncture vs seam | Compatible PVC patch system |
| Top inflatable rim | Valve, seam, small hole | Repair only if manufacturer permits |
| Inflatable cover | Valve and small punctures | Compatible adhesive patch |
| Exterior floor | Sharp-object puncture | Clean, dry, patch as instructed |
| Interior floor | Exact manufacturer procedure | Approved patch for that location |
| Inflation valve | Seal and valve parts | Replacement may be better than patching |
| Welded seam | Separation or structural damage | Check warranty or replacement liner |
| Around fitting | Fitting/seal vs liner damage | Diagnose before applying a patch |
This location-first approach prevents wasting repair material on a problem that needs a replacement component.
What If Your Hot Tub Still Loses Air After Patching?
Do not immediately place a second patch over the first one.
Test the spa again.
Bubbles Appear Around the Patch Edge
The repair has not fully sealed.
Possible causes include:
- contaminated liner
- incomplete adhesive coverage
- trapped air
- incorrect cure
- wrong repair material
The Patch Is Dry, but the Tub Still Softens
There may be another leak.
Inflatable hot tubs can develop more than one small puncture, particularly if the original cause was a rough surface, sharp landscaping, or dragging the liner.
Run the bubble test across the rest of the tub.
The Valve Bubbles During Testing
Check the valve rather than patching the nearby wall.
Follow your spa manual for tightening, seal inspection, or replacement parts.
The Tub Changes Firmness With Weather
Temperature can affect air pressure.
A cooler morning may make the liner feel softer even when no new puncture has developed. Bestway specifically notes temperature-related expansion and contraction in inflatable spas.
When Not to Patch an Inflatable Hot Tub
A patch kit is inexpensive, but repeated repairs stop making sense when the liner itself is failing.
Consider manufacturer support, a replacement liner, or replacement spa when:
- a tear continues growing
- the seam is separating
- the valve body is damaged
- the liner material has become brittle
- several new leaks keep appearing
- the wall is bulging or structurally distorted
- damage is too large for the approved repair
- the spa is under warranty and repair could affect your claim
Bestway recommends a replacement liner or warranty claim when damage is beyond repair, while Intex similarly directs owners toward warranty or replacement where a normal patch is not suitable.
How to Prevent Another Inflatable Hot Tub Puncture
Repairing the leak solves today’s problem. Preventing the next puncture saves more time.
Protect the Bottom
Use the ground cloth or base protection recommended for your spa.
Check the surface before setup for:
- gravel
- sharp stones
- screws
- splintered wood
- plant thorns
- sharp edging
Keep Sharp Objects Away
Avoid glass around the tub and remove jewelry or accessories that could catch the liner.
Bestway specifically recommends keeping spas away from sharp surroundings and avoiding jewelry and glass during use.
Do Not Drag the Liner
Move and store the liner according to the manufacturer’s instructions.
Dragging folded PVC across rough concrete or decking can create damage that may not show until the spa is inflated again.
Do Not Move a Filled Spa
The water inside an inflatable spa weighs thousands of pounds.
Bestway advises against attempting to move the tub while it is filled.
Store It Completely Dry
Moisture left inside folds during storage can lead to mold and make inspection harder when the spa is reopened.
For a broader routine covering filters, water care, cleaning, and storage, follow our inflatable hot tub maintenance guide.
Inflatable Hot Tub Patch Troubleshooting Table
| Problem | Likely Cause | Next Step |
|---|---|---|
| Bubbles at patch edge | Incomplete seal | Deflate if required and redo using correct preparation |
| Patch starts peeling | Poor adhesion or wrong material | Remove failed repair and follow compatible repair instructions |
| Patch slides during repair | Wet or contaminated surface | Clean, dry, and restart |
| Tub softens again overnight | Second leak or failed patch | Bubble-test whole liner |
| Leak returns at a seam | Structural seam problem | Check manufacturer or warranty |
| Air leaks near valve | Valve or seal issue | Inspect valve before patching liner |
| Water appears inside air chamber | Possible internal or seam problem | Stop guessing and contact manufacturer |
| New punctures keep appearing | Liner or setup surface problem | Inspect liner condition and spa base |
Inflatable Hot Tub Leak Repair Action Plan
Use this sequence before ordering more repair supplies:
- Confirm whether you are losing air, water, or both.
- Find the exact leak location.
- Identify whether it is a flat puncture, seam, valve, fitting, or liner failure.
- Check the spa brand and model manual.
- Check warranty status before applying permanent adhesive.
- Choose a patch specifically compatible with the liner and repair location.
- Follow the required surface preparation.
- Follow the exact cure time rather than guessing.
- Reinflate gradually.
- Bubble-test the finished repair before returning the spa to normal use.
For owners deciding whether to repair or replace, our broader inflatable hot tub guide can help you compare the practical limits of portable spas.
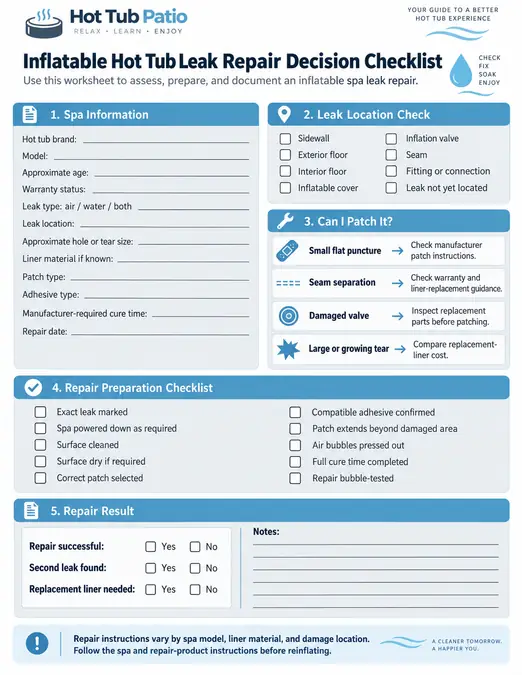
Downloadable Resource
Frequently Asked Questions
Can you patch an inflatable hot tub while it is full of water?
Some manufacturers allow specific patches on certain interior or underwater areas, while other repairs require the liner to be exposed, cleaned, and dried. Check the instructions for your exact spa and repair product before attempting an underwater repair.
What patch works best on an inflatable hot tub?
Use a PVC or vinyl repair system that is compatible with your spa’s liner and approved for the location of the damage. The correct material and preparation matter more than buying the largest repair kit.
Can I use a bicycle or air-mattress patch on an inflatable hot tub?
Do not assume that a patch designed for another inflatable product is suitable for a heated spa. Verify liner compatibility, adhesive compatibility, temperature limits, and manufacturer instructions first.
Why won’t my inflatable hot tub patch stick?
Common causes include dirt, moisture, body oils, the wrong adhesive, trapped air, insufficient curing, or trying to patch a seam as if it were a small puncture.
Can you repair a SaluSpa puncture?
Yes, many small SaluSpa punctures can be repaired using the method specified for the damaged location. Bestway provides different procedures for some covers/interior floors and walls/exterior floors, so check your model instructions before repairing.
Can you repair an Intex PureSpa seam leak?
Intex states that PureSpa seam cracks cannot be repaired using its standard repair process. Check warranty eligibility or replacement options instead of repeatedly covering the seam with patches.
How long should an inflatable hot tub patch dry before reinflating?
There is no single cure time for every spa and adhesive. Manufacturer instructions vary considerably, so follow the waiting period listed for your specific spa, patch, adhesive, and repair location.
Can Gorilla Tape fix an inflatable hot tub?
A general-purpose tape may temporarily cover some damage, but it should not replace a compatible PVC or vinyl repair system unless your spa manufacturer or the tape manufacturer specifically approves the application. Use the repair method designed for the liner whenever possible.
What if my inflatable hot tub keeps losing air after I patch it?
Bubble-test the patch edges, valve, seams, and the rest of the liner. A second puncture, valve leak, failed patch, temperature change, or seam problem may be responsible.
Make the Repair Match the Leak
An inflatable hot tub patch kit works best on the kind of damage it was designed to repair: a small, clearly located puncture on compatible liner material.
Find the leak first, identify whether it involves a flat surface, seam, valve, or fitting, then follow the instructions for that specific repair. Taking a few extra minutes to diagnose the damage is usually more effective than adding another layer of tape or glue to a repair that keeps failing.







One Comment
Comments are closed.