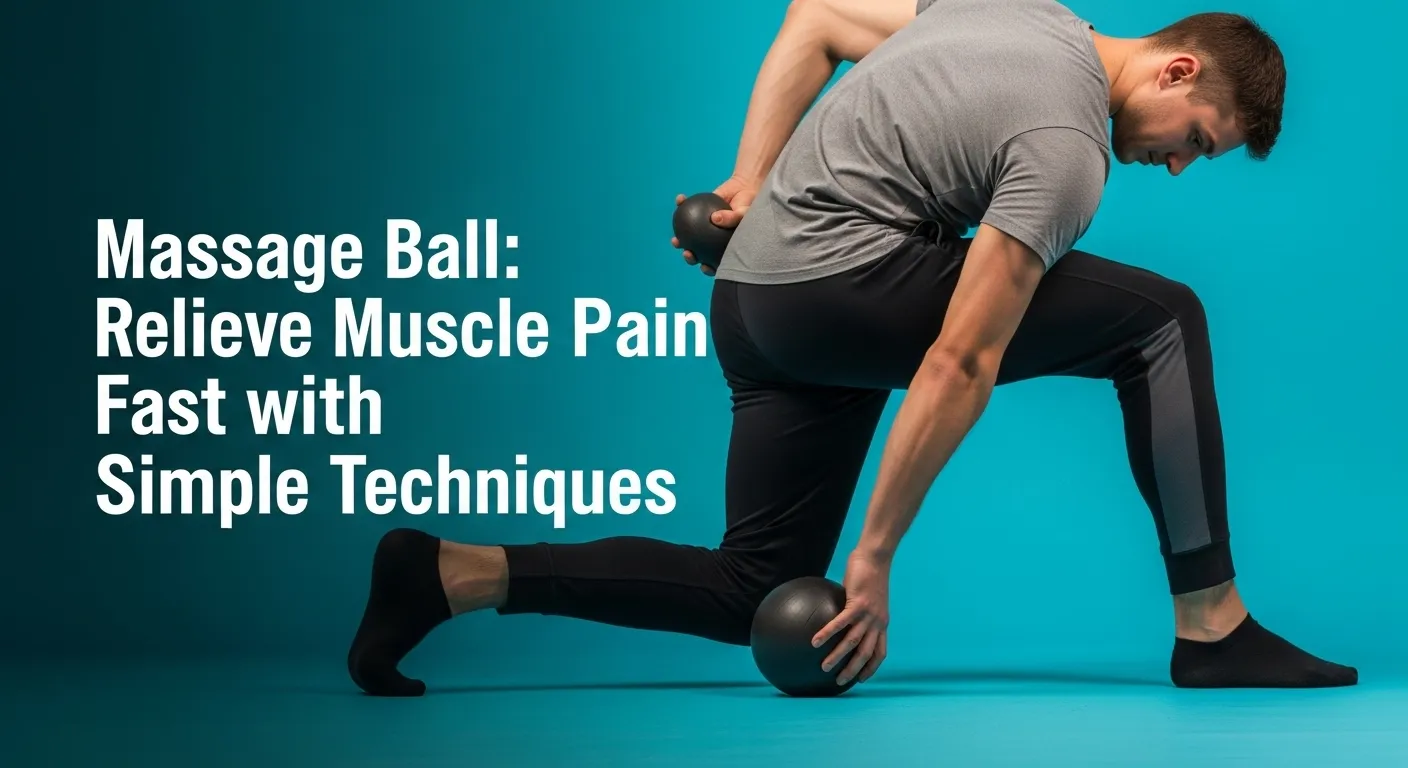
Massage Ball: Relieve Muscle Pain Fast with Simple Techniques
A massage ball is a small, firm tool made of rubber, silicone, or dense foam that uses your body weight to release tension and ease sore muscles. It’s like having a personal massage therapist without the hefty price tag.
- Why Use a Massage Ball (and What It Actually Does)
- Choosing the Right Massage Ball
- How to Use a Massage Ball: Basic Principles
- How to Use a Massage Ball on Specific Areas
- Trigger Point Focus: Finding & Releasing Knots
- Techniques & Patterns for Effective Use
- When & How Often to Use, and How It Fits Into Your Routine
- Maintenance, Safety & Bonus Tips
- Mini Self-Assessment: Find Your Tight Spots
- Expert Tips: Pro Secrets for Maximum Relief
- FAQs
People use it to loosen tight spots from sitting too long, recover after workouts, or simply move better. Research shows that myofascial release, such as using a massage ball, can boost circulation and reduce stiffness by up to 25 percent in just minutes.
Learn about the best oils to use during your sessions by checking out our guide to massage oil ingredients.
In this guide, you’ll learn:
- How it works and why it relieves muscle tension
- How to choose the right ball for your needs
- How to use it safely on legs, feet, and back
- Techniques and tips for the best results
Used regularly, a massage ball can help you feel lighter, move easier, and cut down on those costly therapy sessions.
Why Use a Massage Ball (and What It Actually Does)
A massage ball targets tight knots in your muscles, called trigger points, by pressing into the fascia, the connective tissue that surrounds each muscle. This pressure helps release tension, improve blood flow, and reduce soreness through a process known as myofascial release.
Key Benefits
- Relieves tightness and knots from exercise, stress, or long hours at a desk.
- Improves mobility and circulation, helping muscles recover and move freely.
- Portable and convenient, easy to use at home, work, or while traveling.
Who It’s For
Perfect for athletes, desk workers, and anyone with sore legs, stiff backs, or tired feet. This simple tool makes it easy to release tension and feel better fast, no matter where you are.
Effectiveness of Massage Balls on Different Muscle Groups
Choosing the Right Massage Ball
Not all massage balls feel the same, and the one you choose can make a big difference in comfort and results. The right ball depends on your pain level, the area you’re targeting, and how much pressure you want to apply.
Materials and Firmness
Massage balls come in a few main types:
- Smooth balls provide even pressure and are ideal for sensitive muscles or general use.
- Spiky or textured balls stimulate circulation and help break up deep knots.
- Soft balls (like foam or inflatable ones) are gentle for beginners or sore areas.
- Firm balls (rubber, silicone, or lacrosse-style) reach deep muscle layers and work best for dense areas like the back or glutes.
According to The Physio Company, starting softer and working your way up to a firmer texture helps your body adjust safely.
Size and Shape Considerations
Smaller balls target focused areas such as feet, hands, and specific trigger points. Larger ones cover bigger muscles like the hamstrings, quads, and back. The RAD Roller suggests using medium-sized balls for versatility, especially if you want one tool for both pinpoint and broad pressure.
Where You’ll Use It
Your setup affects your choice too. Plyopic notes that firm balls work best on the floor for deep pressure, while softer or medium-firm options are more comfortable when used against a wall or chair.
Comparison Guide
| Ball Type | Best For | Pressure Level | Use Location |
|---|---|---|---|
| Soft Foam | Beginners, sore muscles | Light | Wall or chair |
| Medium Rubber | General full-body use | Moderate | Floor or wall |
| Hard Rubber / Lacrosse | Deep tissue, glutes, back | Firm | Floor |
| Spiky Ball | Trigger points, circulation | Variable | Floor or wall |
Choosing the right massage ball is all about balance—enough firmness to release tension but not so much that it causes pain. Once you find the one that feels right, it quickly becomes a go-to tool for everyday relief.
If you’re curious about how massage can support male health, read more in our benefits of testicular massage article.
How to Use a Massage Ball: Basic Principles
Using a massage ball is simple, but technique matters. The goal is to apply steady, controlled pressure that releases muscle tension without causing pain. Think of it as helping your muscles relax, not forcing them to.
Pressure Guidelines
RAD Roller recommends aiming for what they call “good discomfort.” You should feel tension and pressure, but not sharp or lingering pain. If your body tenses up or you find yourself holding your breath, you’re pressing too hard. Lighten the pressure or change your position until it feels like a deep stretch instead of pain.
Duration and Frequency
According to VASA Fitness, spend around 60 to 90 seconds on each tight area, repeating the process two to four times a week. For very sore muscles, shorter sessions more often can work better than one long, intense session. Consistency matters more than force—you’ll get better results by doing it regularly.
Rolling vs Holding
The Alignment Studio explains that rolling and holding serve different purposes:
- Rolling helps lengthen the muscle and spread blood flow through the tissue.
- Holding the ball still on a tight spot (a trigger point) helps it release tension over time.
A good routine usually includes a bit of both. Roll slowly until you find a tender area, then pause and hold that position for 20 to 30 seconds while you breathe deeply.
Safety and Things to Avoid
- Don’t roll over joints, bones, or your spine directly.
- Avoid using a massage ball on bruised or inflamed areas.
- If you have chronic pain, nerve issues, or medical conditions, check with a healthcare professional first.
- Always start gently and increase pressure gradually as your muscles adapt.
When done right, using a massage ball feels almost meditative—a mix of relief and calm as your body releases built-up tension. With just a few minutes of mindful practice, it can become one of your easiest recovery habits.
For athletes or active individuals, our sports massage guide covers techniques to improve performance and recovery.
How to Use a Massage Ball on Specific Areas
Tight legs can often pull on your hips and lower back, causing discomfort higher up the chain. By releasing tension in the quads, hamstrings, calves, and IT band, you support better posture and ease back pain that comes from sitting or standing too long.
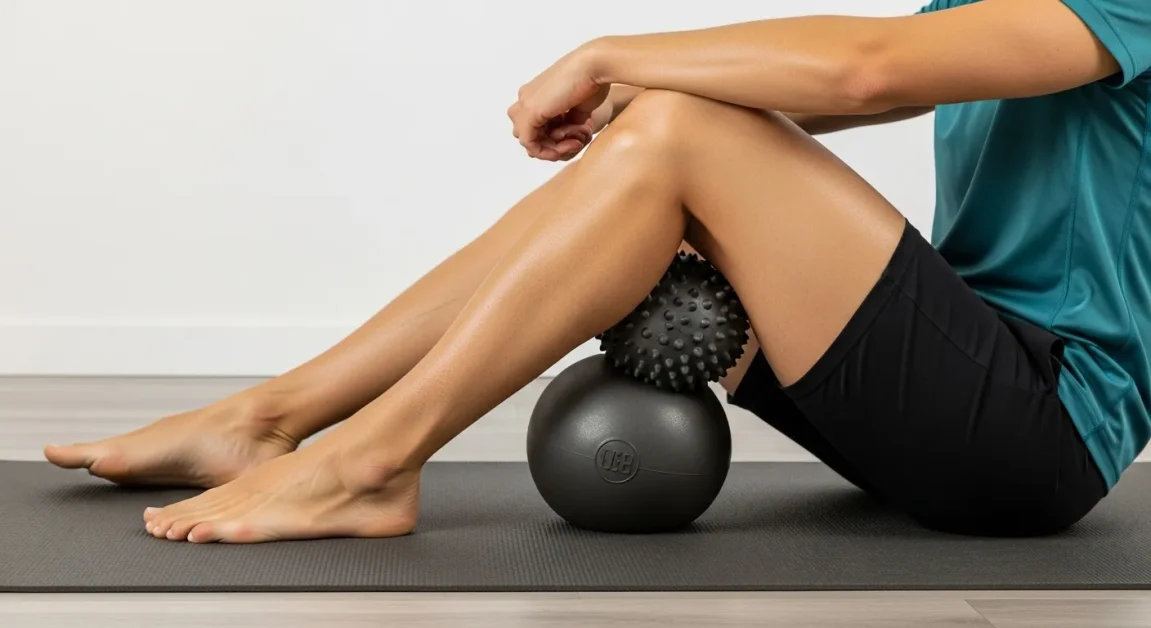
Legs (Quads, Hamstrings, Calves, IT Band)
Your legs take on a lot, walking, workouts, and long hours of sitting can all lead to tight muscles. Using a massage ball helps release that tension, improves circulation, and even reduces pressure on your lower back.
Step-by-Step Guide
1. Quads (front of thighs)
- Sit or lie face down with the ball under one thigh.
- Use your forearms or opposite leg for support and slowly roll from your hip to just above the knee.
- When you hit a tender spot, pause and hold for 20 to 30 seconds before moving on.
2. Hamstrings (back of thighs)
- Sit on a firm surface with the ball under one hamstring.
- Shift your weight slightly side to side or roll forward and back.
- Keep your movements slow and controlled to avoid sliding over the muscle too quickly.
3. Calves
- Sit with your legs extended and the ball under your calf.
- Use your hands to lift your hips slightly, letting your body weight add pressure.
- Roll from the base of your calf up toward the knee, pausing on tight spots.
4. IT Band (outer thigh)
- Lie on your side with the ball under the outer thigh, supporting your weight with your arms.
- Roll slowly between the hip and knee, but don’t apply full pressure directly on the IT band—it’s sensitive tissue.
- Focus on the edges instead, especially near the hip and upper thigh.
Tips for Best Results
- Move slowly, allowing your muscles to relax under the pressure.
- Use deep, steady breathing to help your body release tension.
- Try doing this after workouts or long periods of sitting to keep your legs loose and prevent stiffness.
What to Watch Out For
Avoid rolling over joints like the knees or ankles, and skip areas that feel sharp or painful. Too much pressure can bruise tissue instead of relaxing it.
Expecting parents can see if their sessions are covered by insurance in our prenatal massage insurance guide.
Trigger Point Focus: Finding & Releasing Knots
A trigger point is a small, tender knot in a muscle that often feels tight or sore, sometimes referring pain to other areas. Unlike general muscle soreness, which spreads across a muscle after activity, trigger points are pinpointed and can linger until properly released.
Using this method consistently can reduce tension, improve circulation, and make other self-massage techniques more effective.
How to Identify Trigger Points
- Roll a massage ball slowly over the muscle, paying attention to spots that feel unusually tight or tender.
- Tender areas that cause discomfort when pressed, or sensations radiating to nearby areas, are usually trigger points.
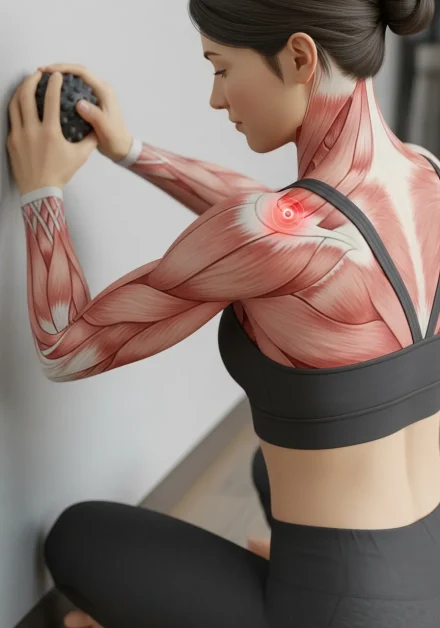
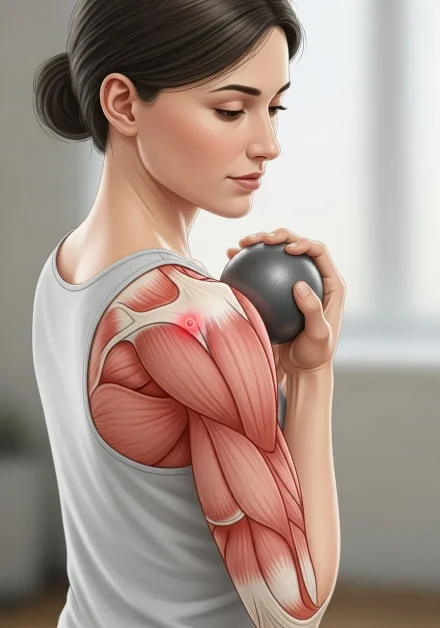
- These points are often found in the neck, shoulders, back, calves, and glutes.
How to Treat Them
- Once located, pause the ball on the trigger point.
- Apply gentle, steady pressure and hold for 20 to 30 seconds while breathing deeply.
- Allow the muscle to relax under the pressure, then release and repeat if necessary.
Integrating Trigger Point Work
Trigger point release works best as part of a larger self-massage routine. Start with rolling larger muscle areas to warm them up, then focus on knots for targeted relief. Regular attention prevents tight spots from building up and supports overall mobility and comfort.
Techniques & Patterns for Effective Use
How you move a massage ball can make a big difference in how well it relieves tension. Using the right patterns helps target muscles efficiently without causing discomfort or injury.
Using these techniques thoughtfully turns a simple massage ball into a highly effective tool for relieving tension and improving mobility.
Rolling Patterns
- Straight line: Move the ball along the length of the muscle for even pressure.
- Zig-zag: Cover more surface area and reach stubborn knots on wider muscles.
- Circles: Focus on specific spots to loosen tight tissue from multiple angles.
Integrating with Stretching or Mobility
After rolling, follow up with gentle stretches or mobility exercises. For example, rolling your calves and then doing ankle circles can improve circulation and prevent tightness from returning. This combination enhances flexibility and helps muscles recover faster.
Mini Routines
- 5-minute leg release after workout: Roll quads, hamstrings, calves, pausing on tight spots.
- Morning back reset before work: Roll upper back and shoulders against a wall, then stretch chest and spine lightly.
Common Mistakes to Avoid
- Over-rolling: Spending too long on one area can irritate muscles instead of relaxing them.
- Using the wrong tool: A ball too hard or too soft may be ineffective or painful.
- Ignoring pain signals: Sharp or lingering pain is a sign to ease pressure or stop.
Wondering about massage timing during your cycle? Check out our tips in getting a massage on your period.
When & How Often to Use, and How It Fits Into Your Routine
Timing and consistency are key to getting the most from a massage ball. Using it strategically can help you stay loose, prevent stiffness, and support recovery.
Used thoughtfully, massage ball work can fit seamlessly into daily routines, helping you stay mobile, reduce tension, and support long-term muscle health.
Timing Tips
- After workouts: Loosen tight muscles and improve circulation to speed up recovery.
- During long sitting periods: Roll your back, glutes, or legs to counteract tension from desk work.
- Before bed: Release built-up stress and muscle tightness for better sleep.
Frequency Advice
- For general maintenance, two to four times per week is effective.
- If muscles are particularly tight or sore, short daily sessions can help without overworking the tissue.
- Start with lighter pressure and shorter sessions, then increase duration or intensity as your muscles adapt.
Monitoring Progress
- Track improvements in flexibility, reduced soreness, or easier movement.
- Adjust pressure, duration, or areas targeted based on what feels most effective.
- Note any discomfort or unusual pain, and modify your approach accordingly.
When to Seek Professional Help
- Persistent pain that doesn’t improve with self-massage.
- Numbness, tingling, or pain radiating down limbs.
- Chronic injuries or conditions that require a healthcare professional’s guidance.
For more details on selecting the right ball type and firmness, check out The Physio Company’s guide to choosing the right massage ball.
Maintenance, Safety & Bonus Tips
Taking care of your massage ball and using it safely ensures it lasts longer and gives the best results without injury.
These simple maintenance steps and safety practices keep your massage routine effective, enjoyable, and injury-free.
Ball Care
- Cleaning: Wipe with mild soap and water after use, especially if you use it at the gym or on bare skin.
- Durability: High-quality rubber or silicone balls can last for years with regular use.
- Replacement: Replace the ball if it cracks, loses firmness, or develops uneven surfaces that affect pressure.
Safety Warnings
- Avoid rolling directly over bones, joints, or your spine.
- Skip areas with bruising, acute injuries, or inflammation.
- Consult a healthcare professional if you have chronic conditions, nerve issues, or persistent pain.
Bonus Tips
- Use a wall for extra control, especially for your back or shoulders.
- Start seated if you’re new to massage balls to manage pressure and balance.
- Combine with a foam roller for larger muscle groups for a more complete session.
A quick tip from everyday experience: someone with tight calves and a long commute found that rolling their calves and feet for just five minutes before bed eased soreness and improved sleep noticeably. Small, consistent sessions like this can make a big difference over time.
Mini Self-Assessment: Find Your Tight Spots
Before diving into rolling and trigger points, it helps to know exactly where your muscles are tight. Think of this as a quick “tension scan” for your body.
How to check:
| Muscle Area | Signs You’re Tight | Severity (1-5) |
|---|---|---|
| Quads (front of thigh) | Feeling stiffness after sitting or stairs | ☐1 ☐2 ☐3 ☐4 ☐5 |
| Hamstrings | Pulling sensation when bending or touching toes | ☐1 ☐2 ☐3 ☐4 ☐5 |
| Calves | Soreness when walking, standing, or climbing | ☐1 ☐2 ☐3 ☐4 ☐5 |
| IT Band (outer thigh) | Hip/knee tension or ache | ☐1 ☐2 ☐3 ☐4 ☐5 |
| Upper Back / Shoulders | Stiff neck, rounded shoulders | ☐1 ☐2 ☐3 ☐4 ☐5 |
Quick tip: Roll a massage ball over each area gently and see if any spots feel particularly tender. That’s your starting point. Scoring each muscle gives you a snapshot of what to prioritize and helps track progress over time.
Expert Tips: Pro Secrets for Maximum Relief
Massage balls are simple tools, but using them smartly can make all the difference. Here are some expert-inspired tricks to get the most out of your sessions:
- Go slow: Rushing over muscles reduces effectiveness. Pause on tender spots for 20–30 seconds.
- Breathe deeply: Holding your breath tenses muscles, so exhale as you press into a knot.
- Use a wall for control: Especially for back and shoulder work, a wall lets you manage pressure safely.
- Start light, then go firmer: Beginners should begin with softer balls and gradually increase firmness as muscles adapt.
- Combine with stretches: Rolling is great, but pairing it with light stretching or mobility moves locks in relief and prevents tightness from returning.
These small adjustments can make self-massage feel less like work and more like a mini spa session at home. Even just five minutes a day with the right approach can leave you moving easier and feeling lighter.
To access additional articles related to Hot Tub Patio or to read more posts related to this topic, please visit the Massages category.

